If you work in industries like manufacturing, environmental compliance, pharmaceuticals, or power generation, you know online monitoring testing equipment isn’t just a tool—it’s the backbone of your ability to meet regulatory requirements, maintain product quality, and keep operations running smoothly. But here’s the hard truth I see every day as an online monitoring testing equipment supplier: 90% of the issues clients report with their continuous emission monitors (CEMs), water quality analyzers, or process gas analyzers don’t come from broken hardware. They come from poor calibration. Online Monitoring Testing Equipment
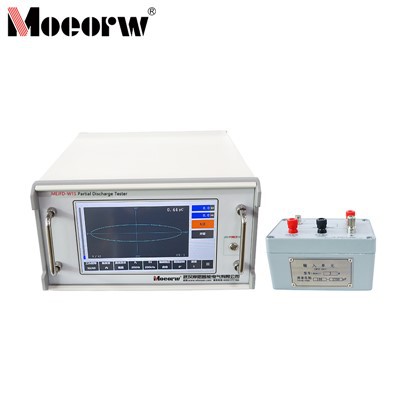
I’ll say that again, because it’s worth repeating: even the highest-grade online monitoring testing equipment will drift, give false readings, or fail audits if it’s not calibrated correctly, on schedule, and the right way. For years, I’ve helped plant managers, lab leads, and maintenance teams walk through calibration that sticks—no last-minute scrambles during regulatory inspections, no wasted money on replacing “faulty” sensors that just needed a tune-up, no fines for out-of-spec data. This post is the same step-by-step framework I give to our direct clients, stripped of sales fluff, built on real-world scenarios.
First, let’s get one thing straight: calibration isn’t the same as validation. Too often I hear teams use the two interchangeably, and that’s where mistakes start. Calibration is the process of comparing your online equipment’s readings against a known, traceable reference standard to adjust for drift, sensor degradation, or signal lag. Validation, by contrast, is checking that those post-calibration readings are accurate enough for your specific application and compliance rules. You can’t do the latter well if you skip the former.
Before you even touch a calibration bottle or adjust a sensor, there are three pre-calibration steps that will make or break the entire process. I call these the “pre-work trifecta,” and I’ve seen teams skip all three and end up re-calibrating three times in one shift.
First: Know your equipment’s calibration timeline and requirements. Not all online monitoring testing equipment is created equal. A CEM for a coal-fired power plant, for example, will have EPA-mandated calibration intervals every 90 days for critical pollutants like NOx or SO2. A water quality pH analyzer in a municipal wastewater plant might require weekly point calibrations, with a full span calibration every six months. Our team logs this for every client on their equipment dashboard, but too many teams just set a generic “calibrate every quarter” alarm that doesn’t account for harsh conditions. If your equipment is installed in a dusty, high-vibration steel mill environment, you’ll need to calibrate more often than a unit in a climate-controlled lab. Check your equipment’s manual, cross-reference with local regulatory bodies (EPA, ISO, EU ETS, whichever applies), and note your plant’s operating conditions—this is non-negotiable.
Second: Gather your calibration materials and verify their traceability. This is where I see even experienced teams cut corners. A 4.00 pH buffer from the local hardware store won’t cut it for online monitoring testing equipment that needs audit-proof data. Every reference standard (gas mixtures, liquid buffers, conductivity solutions) must be traceable to a national metrology institute—like NIST in the U.S., PTB in Germany, or NMIJ in Japan. That means each buffer bottle or gas cylinder has a certificate that proves its concentration is accurate to within 0.5% of the stated value, with an expiration date. I always tell clients to check the expiration date twice: expired standards can drift, and if you use one during calibration, your entire data set becomes invalid. Also, make sure you have the right tools: fresh tubing for sample lines, lint-free wipes to avoid contaminating sensors, a calibrated flow meter to ensure your sample is pulling at the exact rate the equipment was designed for, and access to safe disposal for used calibration materials. Don’t try to make do with an old flow meter you found in a storage closet—our support team gets at least a dozen calls a month from clients whose calibration failed because their flow was off by just 0.2 L/min.
Third: Prep your equipment and your team. Turn off any automated alarm overrides before you start—nothing kills a calibration faster than the system cutting off your sample mid-test because it thinks there’s an error. Run a 10-minute purge of the sample line to flush out any residual gas or liquid that’s been sitting there since the last test. For sensor-based equipment like dissolved oxygen analyzers, let the sensor warm up for at least 15 minutes before you start—cold sensors give artificially low readings, and you’ll adjust for a problem that doesn’t exist. Also, make sure the person doing the calibration knows what they’re doing. I’ve had clients ask a junior maintenance tech who’s only ever changed light bulbs to calibrate a NOx CEM, and that’s a recipe for disaster. Online monitoring testing equipment calibration requires understanding of how the sensor works, how to adjust calibration factors without damaging the unit, and how to document every step for audits. If you don’t have an in-house person with this training, invest in a day of on-site training from a reputable supplier (that’s us, for what it’s worth, but I’ll keep the process general).
Now, the actual calibration steps—this is the part most guides skip, because they’re generic, but I’m giving you the real process we use every time. I’ll use two common examples: a process gas analyzer (for NOx monitoring) and a water quality pH analyzer, since those are the two most frequently calibrated units our clients have.
For a span and zero calibration of a gas-based online monitoring testing equipment (like a CEM for NOx):
- First, take the zero gas standard—this is a mixture with almost zero of the target pollutant (usually nitrogen with less than 1 ppm of NOx, traceable to NIST). Connect it to the sample inlet, making sure all fittings are airtight (even a tiny leak will let in ambient NOx and skew readings).
- Open the gas cylinder valve at the exact flow rate specified in the equipment manual—most units require 0.5 to 1 L/min. Let the unit stabilize for 5 to 10 minutes. You’ll know it’s ready when the reading on the equipment’s display stops fluctuating, usually within ±0.02 ppm.
- Record the stable reading, then compare it to the known concentration of your zero gas. If the equipment’s reading is within ±2% of the zero standard, you’re good to go for the zero point. If not, use the equipment’s calibration menu to adjust the zero offset—only make small adjustments (0.01 at a time), because over-adjusting can damage the sensor.
- Next, take your span gas standard—this is a mixture with a known concentration of the target pollutant, usually around 80% of the upper limit of your equipment’s range (so if your CEM goes up to 100 ppm NOx, use an 80 ppm span gas). Connect it to the sample line at the same flow rate.
- Let the reading stabilize again, record it, and compare it to the span gas’s known concentration. Again, adjust the span factor in small increments if needed. Once both zero and span readings are within your allowed tolerance (most regulations require ±1% of the standard value), wait 5 minutes and verify both points one more time to make sure they’re stable.
For a two-point calibration of a water quality pH online monitoring testing equipment:
- Prepare your buffers ahead of time, and make sure they’re at the same temperature as your sample (pH readings change with temperature, so this is critical). Most clients use a 4.00 and a 7.00 buffer for most applications, or a 7.00 and 10.00 if they’re dealing with high-pH wastewater.
- Rinse the pH probe with deionized water, then gently blot it dry with a lint-free wipe—don’t wipe it, that will create a static charge that skews readings. Immerse it fully in the 7.00 buffer, let it stabilize for 3 to 5 minutes, record the reading, and adjust the mid-point calibration factor if needed.
- Rinse and blot the probe again, immerse in your second buffer (4.00 or 10.00), let stabilize, record, and adjust the slope factor if needed.
- For a final check, immerse the probe in a third, verification buffer (like 1.68 or 12.46, traceable) that’s not part of your calibration points. The reading should be within ±0.05 pH units of the standard. If it’s not, the probe might be fouled or degraded and needs to be cleaned or replaced before you sign off on the calibration.
Here’s a common mistake I see: teams only do a single-point calibration, usually the mid-point, and skip the zero or span. For gas analyzers, that leads to errors at the high and low ends of the range that can cause you to fail audits. For pH, that leads to readings that are off by 0.2 or more, which can make your discharge violate limits. Always do at least two points, tailored to your application’s needs.
Once you’re done calibrating, you can’t just walk away. Documentation is the part that gets teams in trouble during inspections. Regulators don’t care if your readings are perfect—they care that you proved they’re perfect. Every calibration step needs to be recorded, and I mean every single one: the date and time, the type and batch number of each standard, their expiration dates, the flow rate used, the pre-purge time, the pre-calibration sensor temperature, the before and after readings, and any adjustments made. Our online monitoring testing equipment platforms have built-in audit trails that auto-log all of this, which is a lifesaver when you’re being audited at 2 a.m. But even if you don’t have our system, a physical logbook works—just make sure it’s stored in a place it won’t get lost, and that every entry is signed by the person who did the calibration.
Also, don’t forget post-calibration checks. After you adjust the unit, let it run on sample line for at least one hour, and spot-check its readings against a portable reference device (like a portable gas analyzer or a benchtop pH meter) to make sure nothing shifted after calibration. I always tell clients to keep a portable standard on hand for this—small drifts can happen in the first hour after calibration, and catching them early saves you from a mid-shift failure.
Now, let’s talk about how often you should do all this. Generic timelines are a bad idea, as I mentioned earlier. For most industrial applications, critical parameters (NOx, SO2, total organic carbon) need full span and zero calibrations every 90 days, with mid-point checks every 30 days. For less critical parameters, you can stretch to six-month full calibrations, but always check your local regulations. And if you have a sensor that’s prone to fouling—like a sensor in a wastewater plant with heavy particulates—you may need to do a “wet calibration” (disassembling the sensor to clean the membrane) every 30 days, even if the digital reading seems fine. I once had a client who skipped a wet calibration for a dissolved oxygen sensor for six months, and ended up with a batch of product that was 20% over oxygen limits because the sensor’s membrane was covered in sludge. That cost them $200k in rework—way more than the cost of monthly calibrations.
Here’s a final truth: calibration isn’t a one-time task, and it’s not a chore. It’s the only way to make sure your online monitoring testing equipment is doing what it’s supposed to do—protect your bottom line, keep you compliant, and give you data you can trust. I’ve worked with clients who thought calibrating every quarter was overkill, until they got a $50k EPA fine for faulty readings. I’ve worked with teams who spent hours troubleshooting their equipment, only to realize it was out of calibration by 0.3 pH units, which took 10 minutes to fix.

If you’re struggling with calibration that’s taking too long, failing audits, or giving inconsistent readings, or if you need guidance on setting up a calibration schedule that fits your specific operations, we’re here to help. Don’t let faulty calibration turn your reliable online monitoring testing equipment into a liability. Reach out to our team to discuss your calibration needs, and we’ll walk you through a tailored plan that works for your facility, no pressure, no sales pitches.
VLF AC Hipot Test Set References
- U.S. Environmental Protection Agency. (2022). “Guidance for Continuous Emission Monitoring System (CEMS) Calibration and Performance Testing.” EPA 454/B-22-001.
- International Organization for Standardization. (2019). “ISO 17025: General Requirements for the Competence of Testing and Calibration Laboratories.” ISO, Geneva.
- American Water Works Association. (2021). “Calibration Protocols for Online Water Quality Monitoring Equipment.” AWWA Manual of Practice M49.
- National Institute of Standards and Technology. (2020). “Traceability of Reference Materials for Gas and Liquid Phase Analytical Measurements.” NIST Special Publication 250-98.
Wuhan Moen Intelligent Electric Co., Ltd.
As one of the most professional online monitoring testing equipment manufacturers in China, we’re featured by quality products and good price. Please rest assured to buy high quality online monitoring testing equipment in stock here and get quotation from our factory. Customized orders are welcome.
Address: Building A, No.1, Fenghuangyuan 2nd Road, Donghu New Technology Development Zone, Wuhan, Hubei, China
E-mail: info@hvhipotsystem.com
WebSite: https://www.hvhipotsystem.com/
